How I create papercraft statues (using my Silhouette Cameo)
February 20, 2020
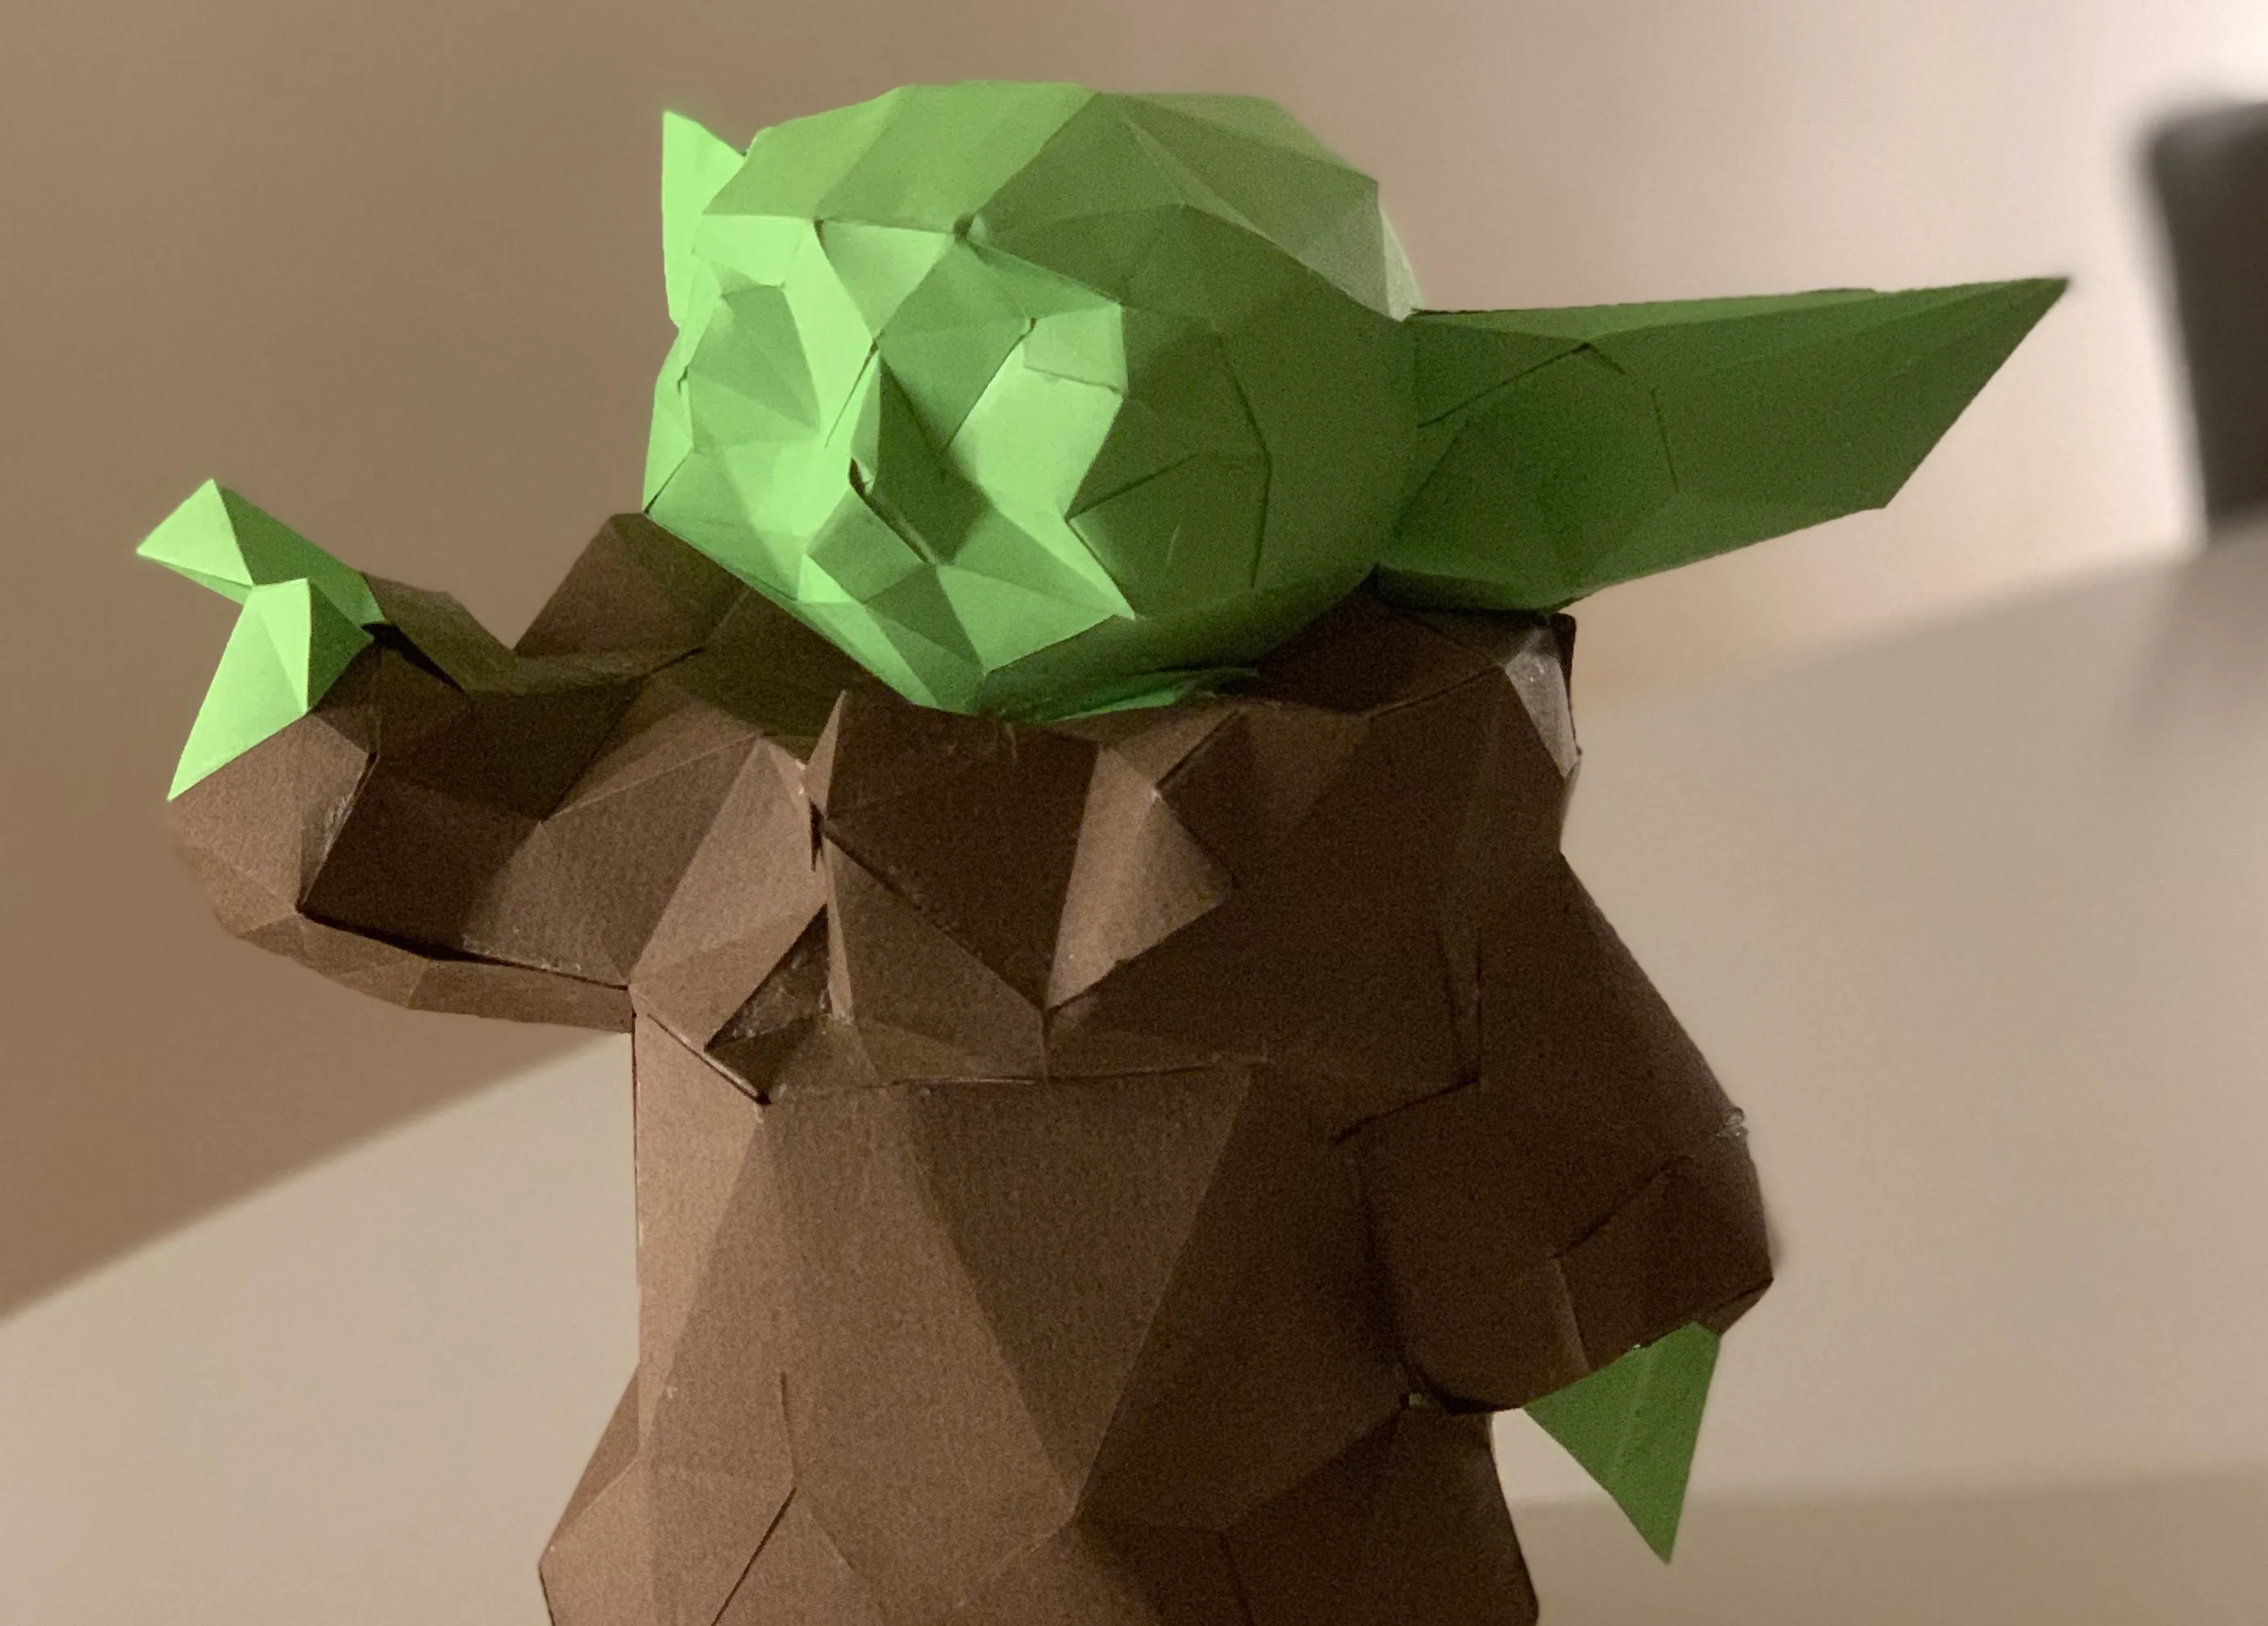
You might have seen these papercarfts, low poly, statues or animals floating around the web. I actually bought a nice giraffe trophy, and then wondered if I could do it myself.
This baby yoda is my first project made by myself, and it is fairly easy to do (if you buy the right tools).
First step: the 3D model
You need to start with a 3D model, there are three different ways to can create one (that I have looked into):
- find a low poly statue
- find a high poly statue and lower the resolution
- scan an object in the world and lower the resolution
- build yourself a 3D model
For all the methods you will need a editor for 3D objects. Personally I played with Blender, as it is good (and free).
Finding a low poly statue
Online you can find free (or paying) 3D models. I go on the thingiverse or cadnav for instance. You can find there some low poly models.
For the next step you will need to have them in .obj format. You can use
Blender to do the conversion. The steps are the following:
- open a new project
- remove the default cube (select it and then press
X) - import from
.stl(which is the standard format for the objects I found so far - export as
.obj
Lowering the resolution of a high poly statue
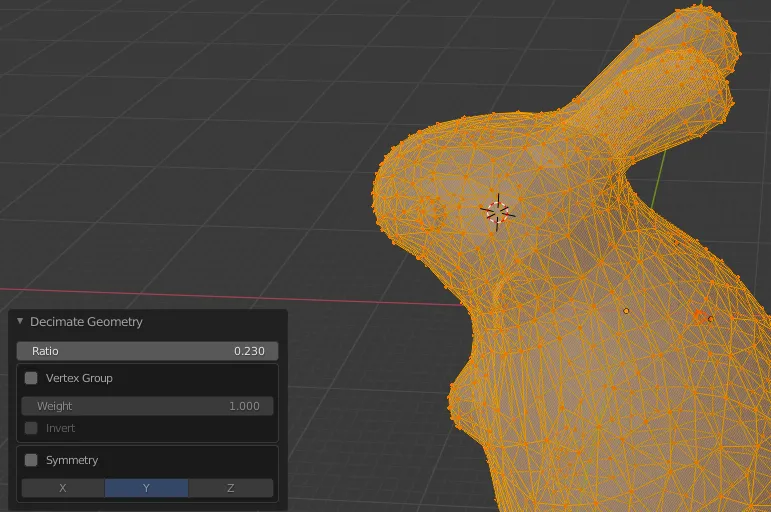
For high poly statues the steps are very similar than for low poly, you will need to lower the resolution. For which Blender has the right tool as well.
Once your model is loaded into your scene in Blender, select all the points and use the decimate function. Lower the ratio until you reach a number of polygons that seem good for you. This answer can help you as well.
Scanning a real world object
This is something that I have not tried (yet). But I figured out that with recent phones it should be possible to scan a real world object. For instance this app for iOS seems nice.
Buiding the model yourself from scratch
Finally you can go deep with Blender and learn to build yourself a 3D model. Obviously this is a world into itself and you will need to learn how to use these tools. As I said, I personally played with Blender and there are lots of nice tutorials out there.
Second Step: Making it flat
Once we have a 3D object, we need to flatten it. This part will need you to buy a little bit of software. There is a functionality withing Blender to do it – but I was not convinced by it.
As I am a Mac user, I tried (and then bought)
Unfolder. In this app you can load an .obj file
and it will make chunks that are flat. You can then modify them, cut in some
places and group others.
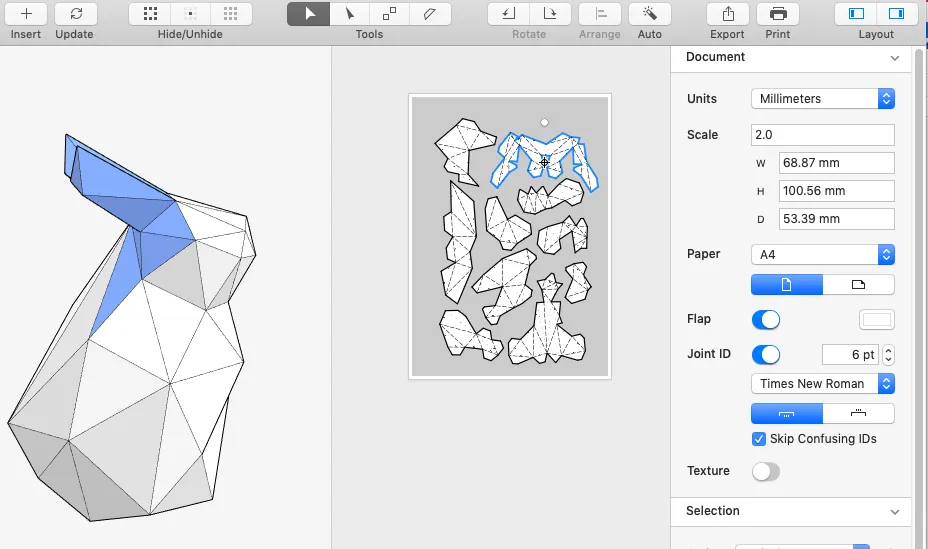
I advice you to spend quite some time in there to think of how the different tricky parts will be separated. I am not great at it yet, and figuring out ways to make my life easier afterwards. Typically it seems to be better to have cuts along long edges - it makes the pasting better.
You can also look at the 3D render to separate the pieces with different colors (and use multiple papers of different color).
Do not forget to enable numbers for flap, use the auto functionality to optimise the flap sizes and organise the different parts.
To prepare for the next step we will export into 2 formats: .dxf for the cuts
and .png for the print. You can also export a .pdf if you want to do the
cutting by hand.
Note that there is an equivalent software for Windows (that seems uglier but with more features, pepakura
Third Step: cutting
First, if you do not have a cutting machine and do not want to invest more money in this project you can print the pdf and then cut by hand. Depending on the project there can be lots of cuts to make.
I bought myself a Silhouette Cameo 4. This will make this step way faster.
In the silhouette studio software import the .png file (it contains all the
numbers, as well as the marks for folding. You can now import the .dxf file
and make sure both overlay perfectly.
Add the alignment marks and then print on the paper of the color you are interested in. I used 160mg paper - it worked fine for my projects. Note that with dark color papers you might want to strengthen the black alignment marks with a marker.
Once you have the paper printed, we can actually use the silhouette machine. In the send menu you will select the different lines. Do a first pass for the scoring marks. You will select only the (blue and green I think) lines for a first pass as scoring - it should not go though the paper, only make it easier to fold in the right place.
Then cut the pieces (the red lines).
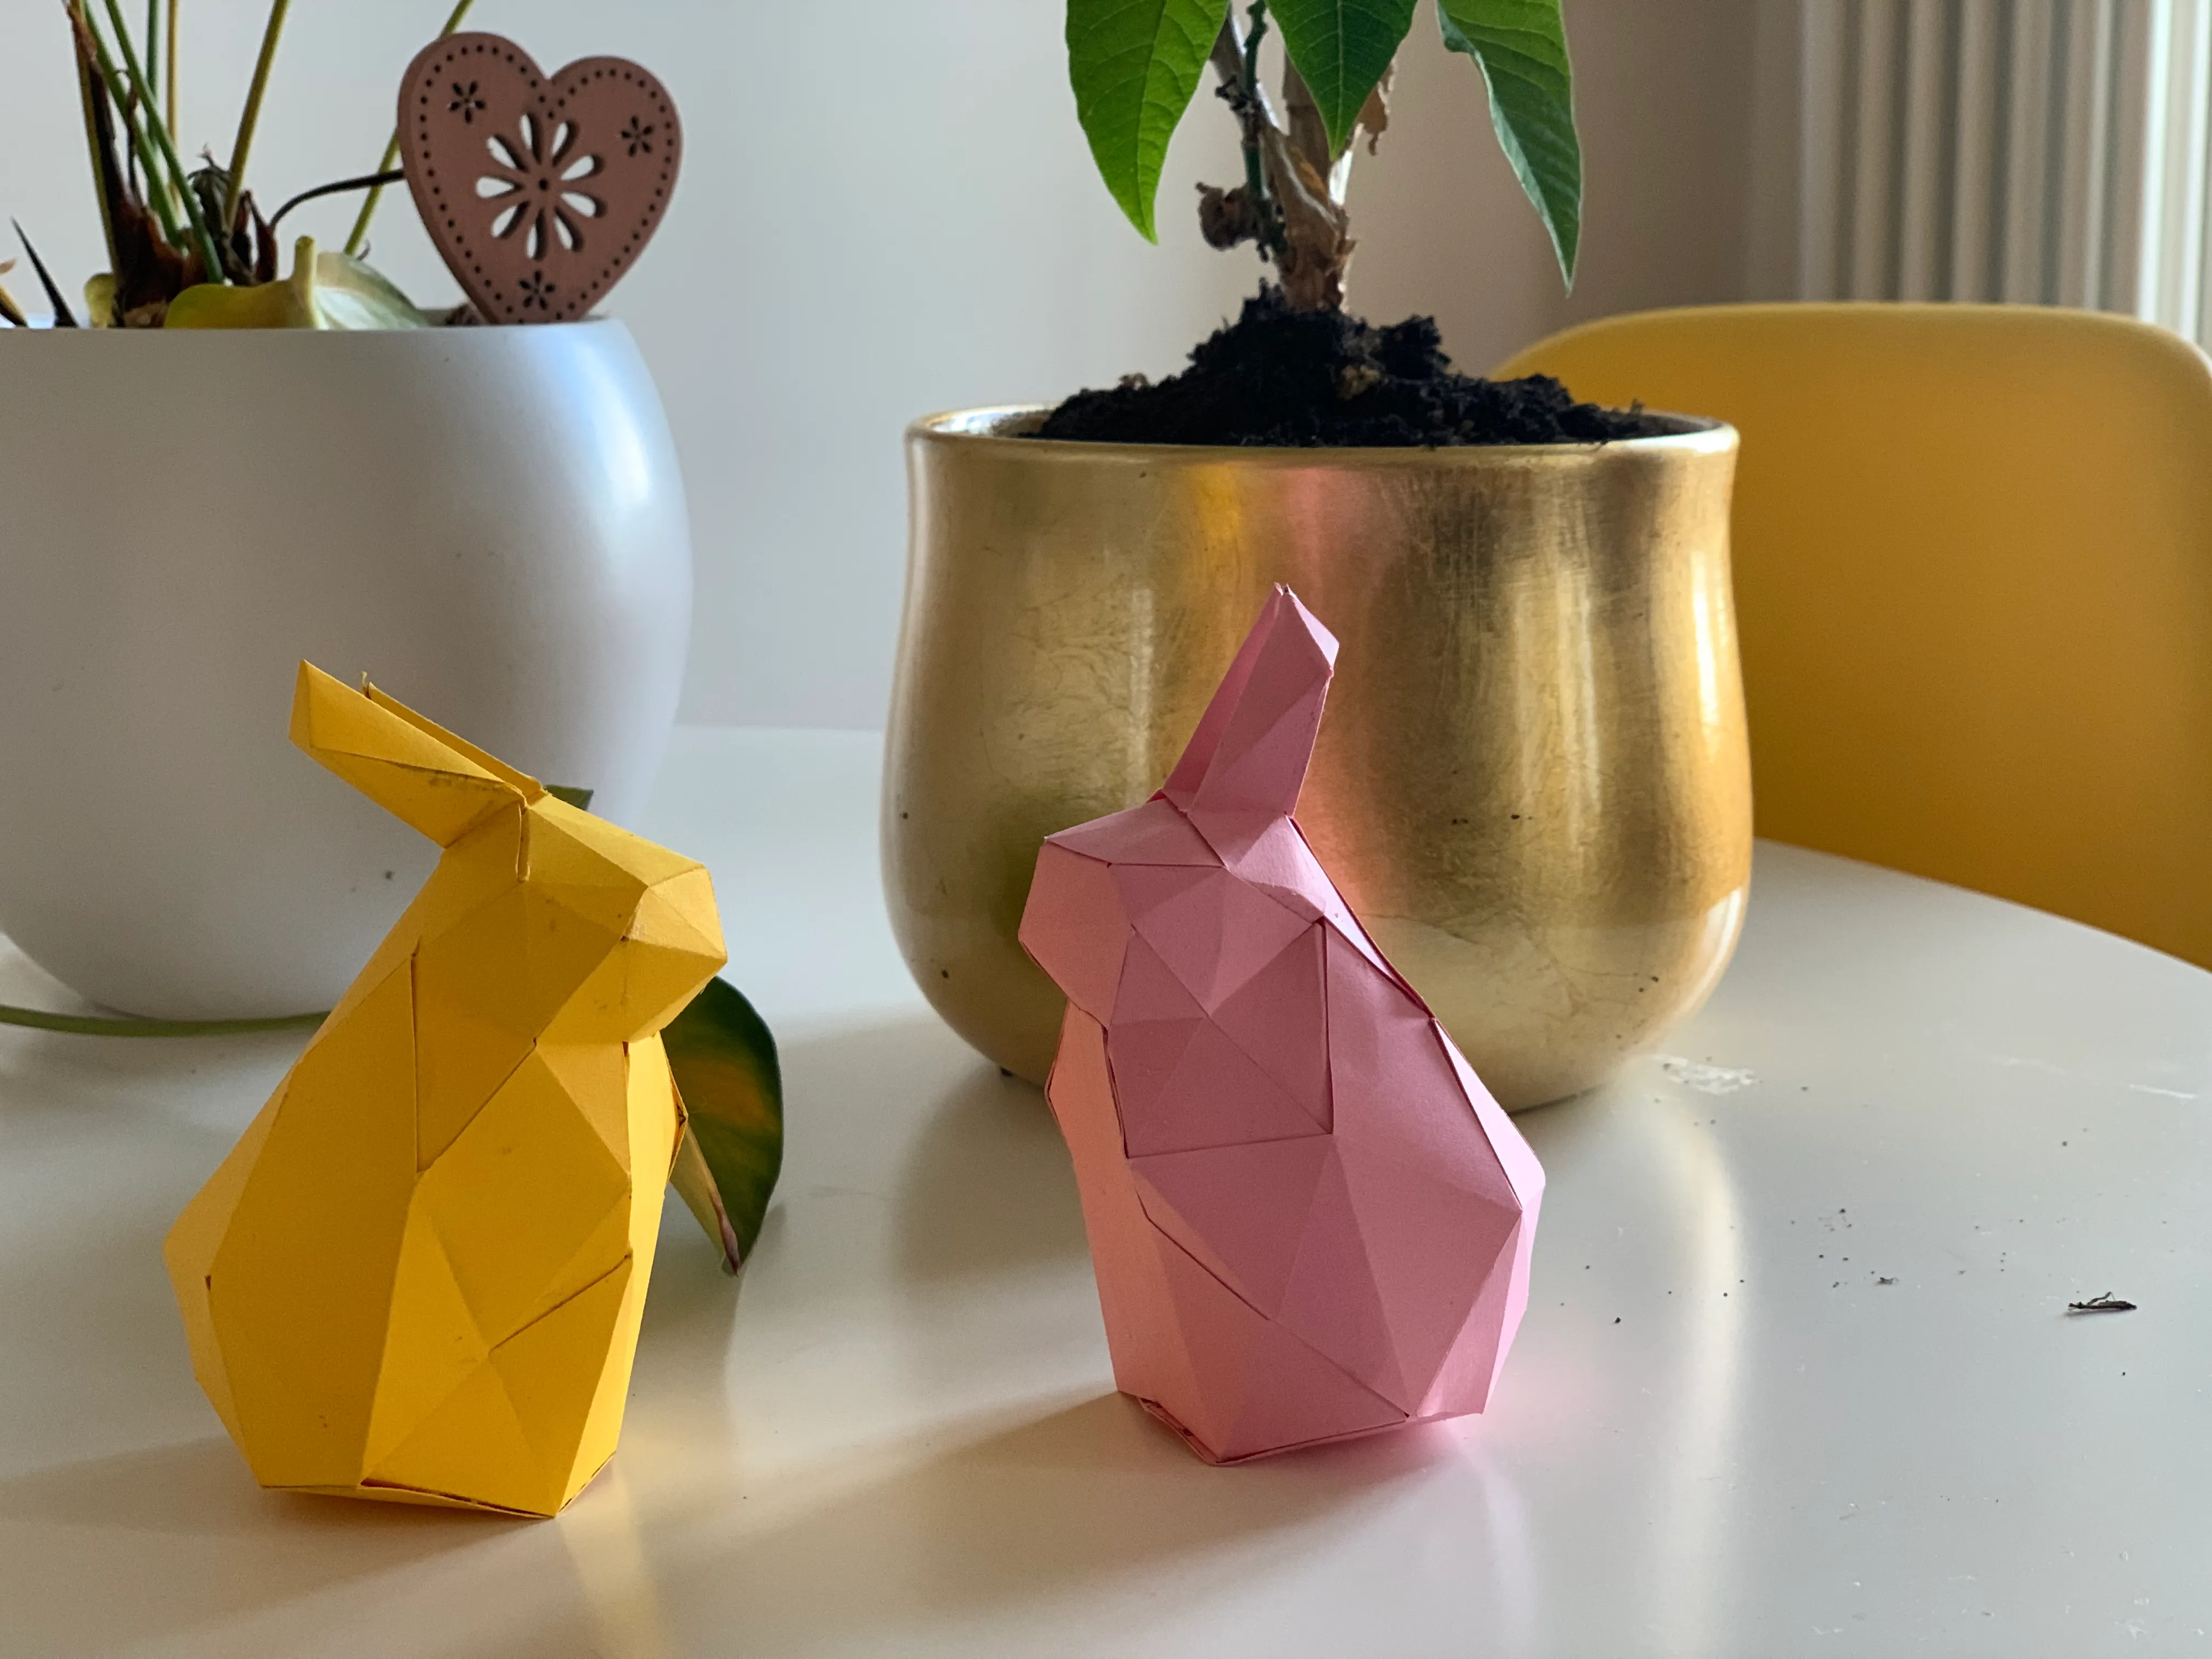
Fourth Step: folding and pasting
You now have a bunch of paper cuts. Go though them and fold according to the lines. Note that for the ‘valley’ folds, start folding them the other way and then the right way, it will be easier.
The whole pasting can take time, but I really enjoy the activity, it feels quite zen.
You can discuss this on Mastodon