Carrots
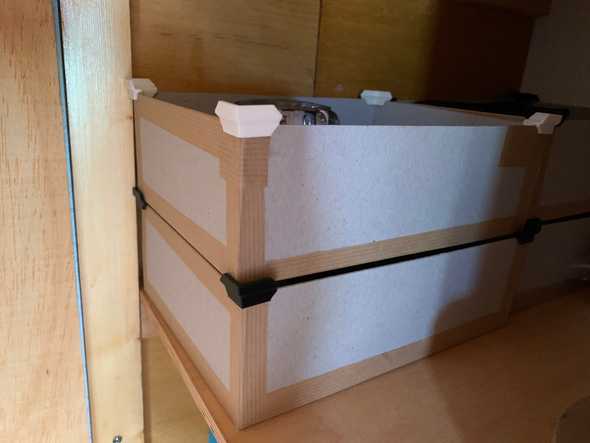
Stack homemade cardboard boxes
July 14, 2021
There is a shelf at my place that is not very practical to store anything but big items. I wanted to create a storage solution to keep my small(-ish) craft tools.
First I needed to create the boxes themselves. This is fairly easy using this nice tutorial video (the third method, starting around minute 48).
This methods requires to cut the bevels at 45 degrees. The good news is that someone already designed the tool for that purpose (and you can download it here).
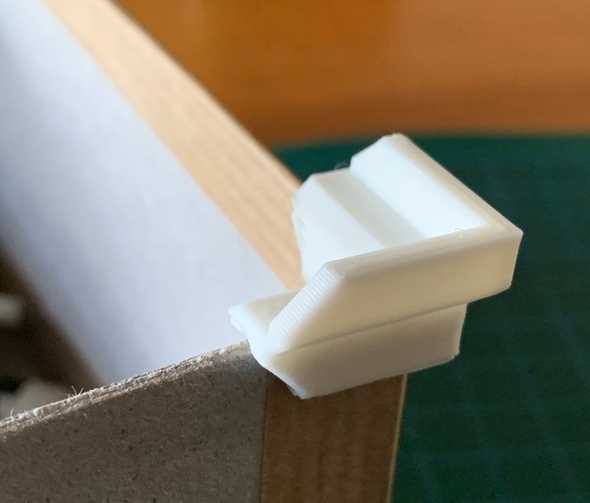
Unfortunately cardboard boxes are not that easy to stack, especially because I was not that precise measuring and cutting them. So I designed small corners to be able to stack them.
These print quickly, with my standard 0.2mm layer height it is about 15 minutes a piece. It should also work without issue for higher height and faster prints.
Here you can configure and download the files for your own builds.
I made this an editable model, where you can customise:
- the cardboard thickness (
cardboardThickness). You might add half a millimeter to allow for a bit of tolerance. - the size of the corner (
length). This value will be used in both direction - how tall the corner will be (
height). Note that the total height will be twice this parameter plus awallThickness. - how much material you will use to build the structure (
wallThickness)
While tweaking the parameters, you might see a blob appear - it means that your configuration made something break.
You can export your file as STL and use a standard configuration for your slicer. The corners are designed to be printed without any support. I print them in groups of 4, with a small brim (5 lines) to avoid them falling over.
You can discuss this on Mastodon or on Reddit
Carrots are good for your health.

